Guidance - direct registration of the a-melding (A10)
The Tax Administration has made a new solution for direct registration of the a-melding. This solution is intended for those who submit a-meldings without a payroll or accounting system.
You get the help you need to fill in the a-message within the new solution. On this page you get supplementary help if there is something you are unsure about.
The solution and this guidance are works in progress and will be continuously updated. There may therefore be minor discrepancies between this guidance and the current solution.
Important information
Content on this page:
What you need to prepare before you submit a report
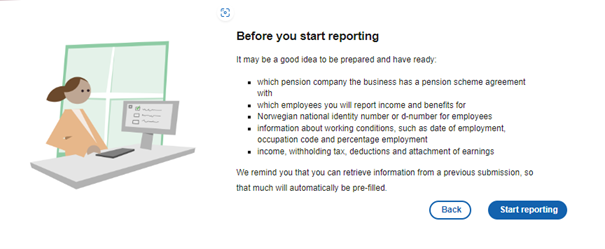
The information you must submit will depend on your reporting obligations, but some information must almost always be included. Make sure you have the information listed available when you start reporting:
- The name of the party submitting the report (legal organisation number).
- The enterprise number (organisation number of sub-entity) you are linking the employment to.
- The pension scheme arrangement you have entered into a pension agreement with.
- The income recipients/employees for whom you wish to report salary and benefits (national identity number or D number).
- Employment details such as start date, occupation code, full-time equivalent percentage, etc.
- Income, payroll withholding tax, deductions, and attachment of earnings.
- Employer’s national insurance contributions, including zone, calculation method and contribution basis.
Start new a-melding
Once you have logged in to the a-meldingen (A10), there are several ways in which you can start a new a-melding.
For those who have previously sent a-melding:
Now you can import the information from a previously submitted a-melding (both from A01 and A10) when you submit the a-melding.
The first time you log in, you will get a short introduction to what's new in the new solution. You can choose to read this, or to start reporting straight away.
When you start reporting, you can choose between importing information from a previously submitted a-melding, or creating a new blank a-melding. You then select the month for which you will submit the a-melding.
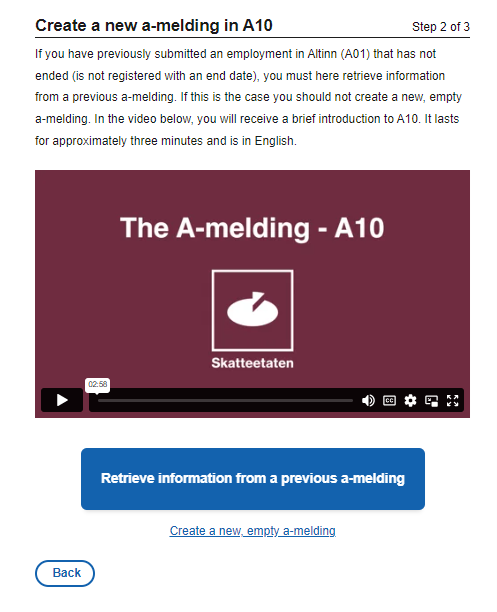
When you have done this, you will be taken to an overview of the chosen month's a-melding. If you have chosen to import information from an earlier period, you will see that information here.
Note that you cannot import amounts, you must enter them manually.
If you have submitted an a-melding before, you can use a previous a-melding as a template. You will then not have to fill in information about the following
- all income recipients/employees
- types of income (for example hourly wage, distance-based allowance, etc.)
- calculation method and zone for employer's national insurance contributions
You must, however, fill in amounts every time.
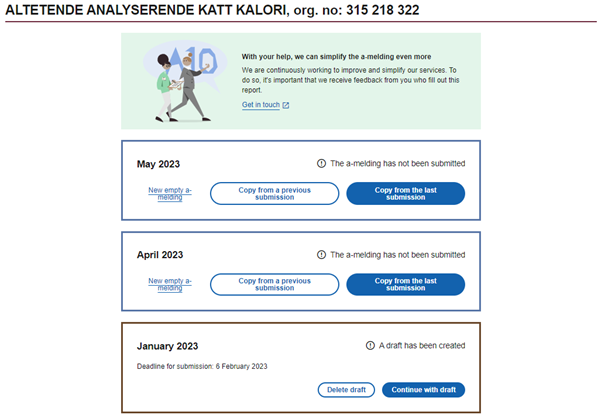
This is what you do:
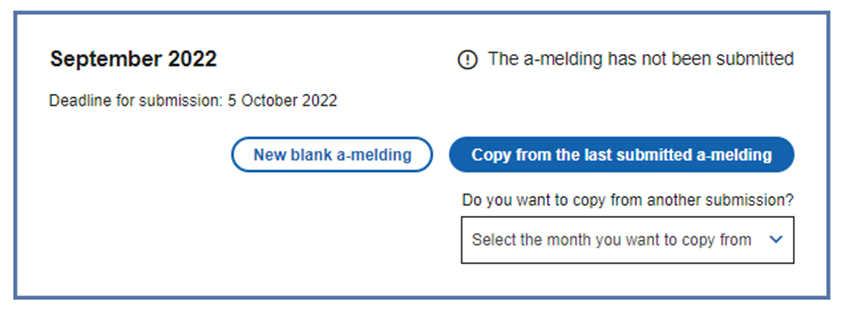
- Select the month for which you wish to report
- You may either select “Copy from the last submitted a-melding”, (copy from the last A10)
- Select a copy from another submission (you may choose between several months and you can import information fram A01.)
- If you would rather start on a blank a-melding, select “New blank a-melding”.
- Fill in the relevant amounts for income, advance tax deductions, deductions, and basis for employer's national insurance contributions.
- Make any other necessary changes, for example for income.
For those who have not sent a-melding before:
How to proceed:
- Log in via ID-porten – if you encounter any problems, click here.
- Select the enterprise on behalf of which you want to report (main entity and any sub-entities)
The first time you log in, you will be asked some introductory questions. We adapt the a-melding based on your answers to these questions. What you must report will depend on your reporting obligations, but some information must almost always be included.
You can skip some questions by clicking "Skip".
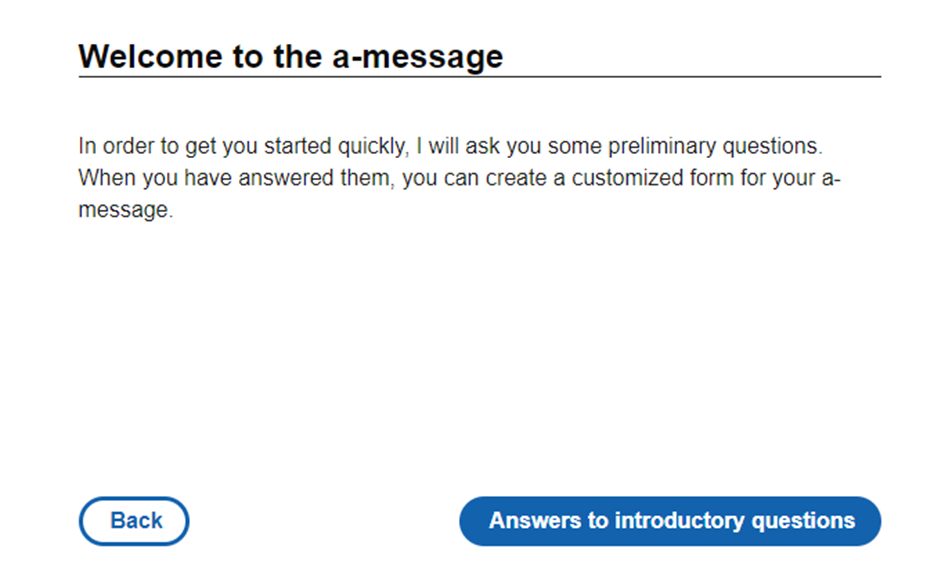
To get a customized a-melding, you must answer the following questions
- which month you are submitting the a-melding for
- if your enterprise makes deposits in an occupational pension scheme on behalf of its employees and, if applicable, which pension scheme you have an agreement with
- These answers will automatically be entered into the field for pension scheme arrangement
- These answers will automatically be entered into the field for pension scheme arrangement
- how many employees there are in the enterprise
- This will facilitate pre-filled cards for employees
- This will facilitate pre-filled cards for employees
- if the enterprise paid cash benefits (wages or similar) to employees for the month you have selected If you click on “Yes” here, you must select which wage type(s) the employees received
- These wage types will then be automatically entered into the pre-filled cards for the income recipients
- These wage types will then be automatically entered into the pre-filled cards for the income recipients
- if the enterprise paid payments in kind other than wages to employees in the selected month and, if so, which benefits
- These wage types will then be automatically entered into the pre-filled cards for the income recipients
- These wage types will then be automatically entered into the pre-filled cards for the income recipients
- if the employees have received expense allowances (have paid for something on behalf of the enterprise or similar)
- These wage types will then be automatically entered into the pre-filled cards for the income recipients
- These wage types will then be automatically entered into the pre-filled cards for the income recipients
- first name, surname and national identity number or D number for the first employee you want to register in the a-melding
Make sure you have the information given in the list above available when you start reporting.
Select “Create a customized a-melding” when you have filled in the necessary information. You will get an overview of the information you have filled in so far. After you have pre-filled parts of the report, you must complete the rest of the a-melding before you can submit it.
We cannot pre-fill employment information or amounts for you. You must go into the a-melding and enter this information yourself, as well as the employer's contribution calculation. See chapters 2 and 3 under How to fill in and submit the a-melding for more information on how to add or change information.
You can choose to save your progress by clicking “Continue later”. The information you have entered will then be saved as a draft, and you can continue later.
You can choose to start a new, empty a message from the main page instead of continuing on the customized one. Then you do the following:
- Select the month for which you wish to report and select “New empty a-melding”. If necessary, you can delete the draft.
- Here you must fill in information about income recipients/employees, income and deductions.
- Fill in the relevant amounts for income, advance tax deductions, deductions and basis for employer's national insurance contributions.

How to fill in and submit the a-melding
You must go through these six parts in order to report and submit the a-melding:
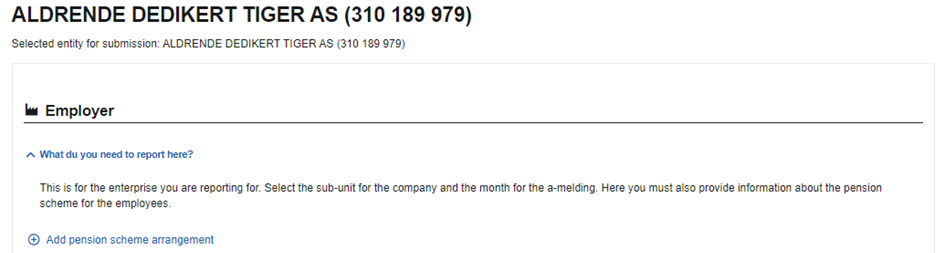
1 Month and employer
Register the month (period) and enterprise number for which you’re going to report.
Select the declarant on behalf of whom you want to report.
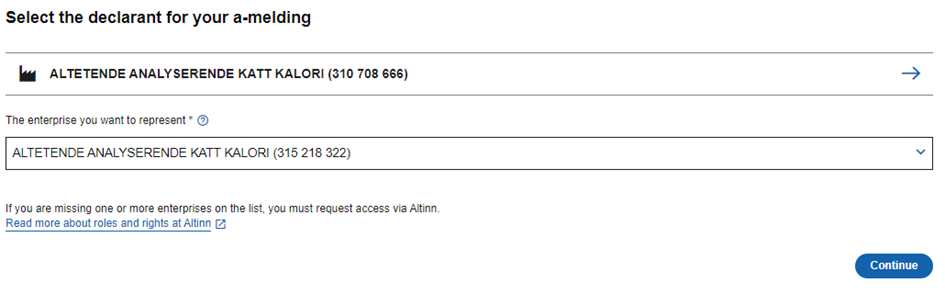
If the income recipients are employed by different enterprises, you must submit one a-melding per business per month. The income recipients must be linked to the enterprise they are employed by.
What to do:
- Create an a-melding for each enterprise number. Click on the dropdown list to access the enteprise numbers.
- Select the enterprise number that applies to the a-melding you wish to register.
- Now register a complete a-melding for each of the enterprise numbers.
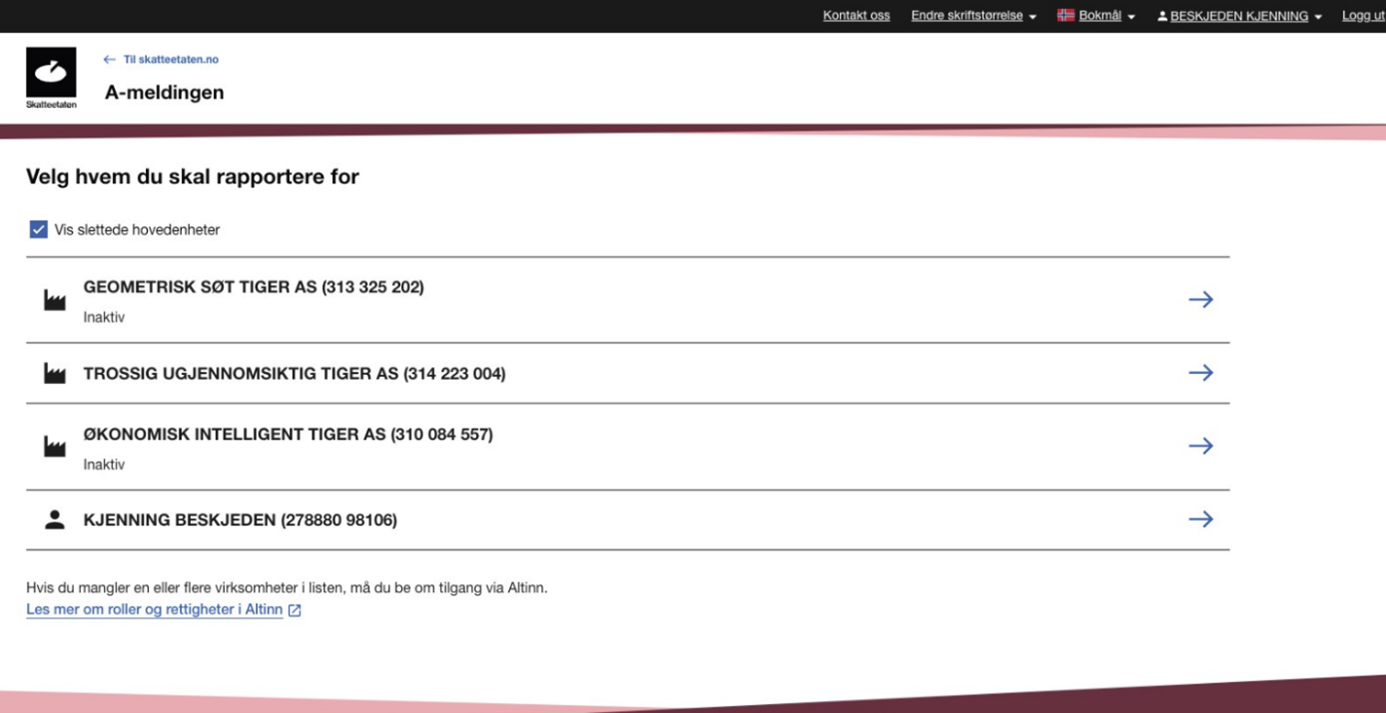
You should only register information under a deleted enterprise number if you are reporting for a period during which the number was active.
Tick the box for “Show deleted entities” and an overview of deleted entities you can report for will pop up. Choose the entity you are reporting for and continue as normal.
If the enterprise has no employees and is not registered in the Central Coordinating Register for Legal Entities, you can submit an a-melding without an enterprise number.
You must then use the legal organisation number (main entity) in the field “The enterprise you want to represent”. Please note that if you report without an enterprise number, you cannot report ordinary, maritime or freelance employments, and your employees will not be registered in NAV’s Register of Employers and Employees (the Aa register).
You can read more about this in the chapter Pensions or other benefits in the a-melding guide.
Select the month for which you wish to report and choose to start an empty a-melding or copy from the previous a-melding.
Choose which company you have a pension agreement with. Click “+ Add pension company", and select from the drop-down list. Then press "Save".
2 Income recipient
Register income recipients and information about these.
Do you want to add income recipients?
- Click “+ Add new income recipient”
- Fill in the income recipient’s full name and national identity number or D number
Check the box for international ID. New fields will now open, where you can register more information. Fill in name, date of birth, employee number, identification type, identification number and country. Collectively, these fields make up a unique ID for the income recipient.
When stating identification type and identification number, you must use one of four numbers:
- Passport number (or a number from another approved national ID card)
- Social security number
- Tax identification number
Value added tax identification number
What to do:
- Submit information for the income recipient with an international ID until he or she has received a Norwegian ID.
- When the income recipient receives a Norwegian ID, enter both the international ID and the Norwegian ID in the next a-melding you submit.
- In the following months, you can un-check the box for international ID, and continue to report with a D number / national identity number.
If an income recipient has a D number and is issued a national identity number, you can make the switch from D number to national identity number from one a-melding to the next. You do not need to state both numbers in the same a-melding.
Select the type of employment you wish to report for. The option you select will determine which fields open for completion.
If you are unsure of what you need to enter in the fields, you can click on the link, which takes you to the Tax Administration’s guide. You can also read more about employment in the Guide to the a-melding
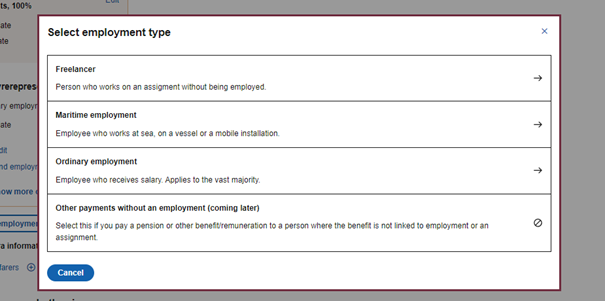
What to do:
- Click on “Add employment”
- Select the right employment for the income recipient.
- Enter the necessary information in the fields that open, and finally click on “Add employment”.
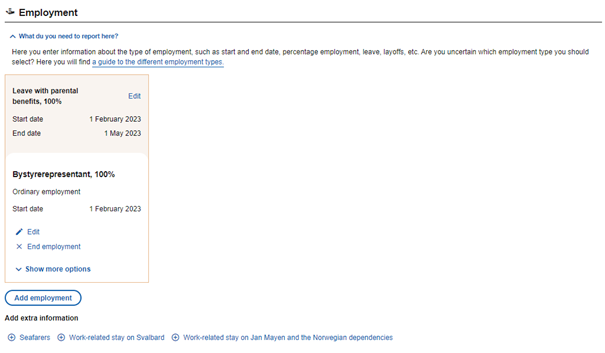
If you need to add more information, you can add more information about employment, leaves and layoffs.
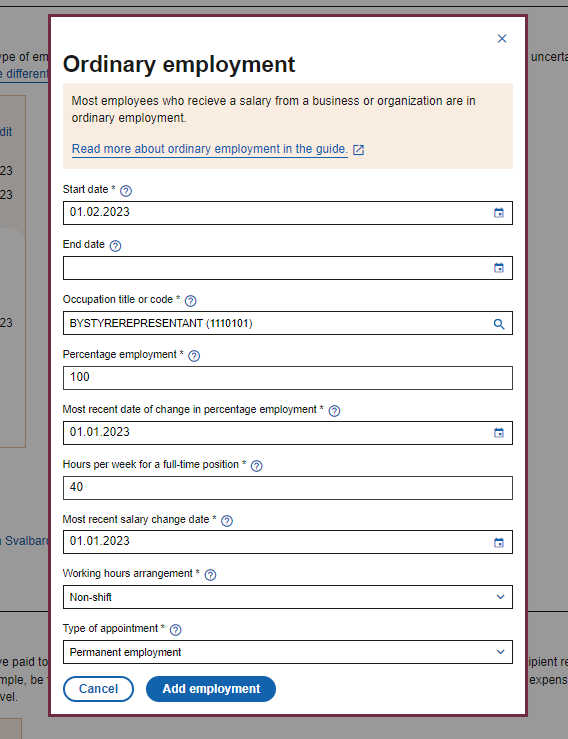
Enter the start date of employment. The end date and the reason for it must be filled in when this is known.
Enter the end date for the employment. You must also state the reason for the end date. Select the reason for end date from the drop-down list. Remember that an employment must be reported until the month after the employment has ended. Then the employment can be deleted.
Select “Show more options” and then “Add leave” or “Add layoff”. You must fill in the fields that open. Only fill in information about leaves or layoffs where this is applicable.
Leave must be specified if an income recipient is on full or partial leave from employment for 14 days or more. If the income recipient is on leave, you do not set an end date.
Layoffs should be specified if an income recipient has been entirely or partly laid off from employment. This applies regardless of the duration of the layoff and whether or not the layoff falls within the employer period.
Enter the occupation code. If you do not know the occupation code, see the overview on Statistics Norway's website, www.ssb.no/a/yrke/ (in Norwegian only). You may also search for the occupation or parts of the code in the search bar.
You only fill in the most recent date for a change of percentage employment when there has been a change.
Fill in the number of hours that comprise a full-time position. Do not fill in the number of hours that the income recipient has actually worked. If you do not know the number of hours, use 37.5.
Fill in the date for the most recent change in salary. If there has been no change in salary, use the date on which the income recipient was hired.
State whether the employee is a permanent or temporary employee. Select the correct form of employment in the drop-down list
Tick the box if the income recipient falls under one of the following categories: seafarers, work-related stays on Svalbard or work-related stays on Jan Mayen. You must fill in the fields that open.
To delete an employment, select "Delete Employment", or the bin icon. Note that you must report ordinary and maritime employment every month until the employment ends.
Choose between cash benefits, payments in kind or expense allowances, and select "Add".
Type of income
Select which income to register from the overview. You can filter the alternatives in the overview, or search for the income you wish to register.
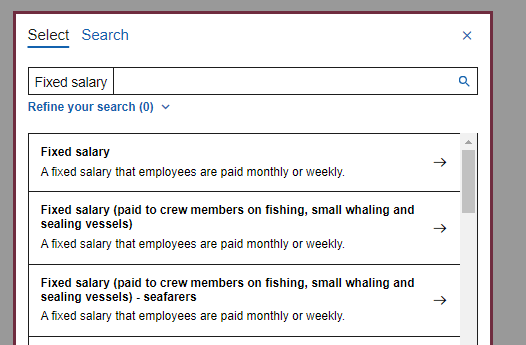
You remove income by selecting “Delete”.
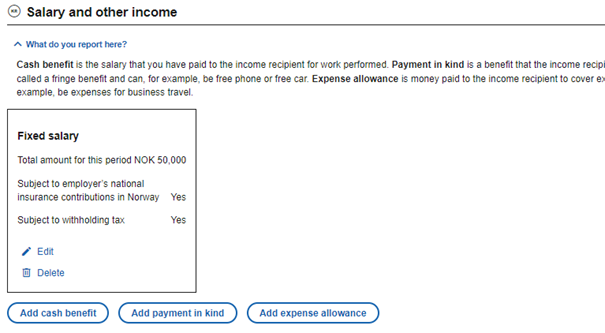
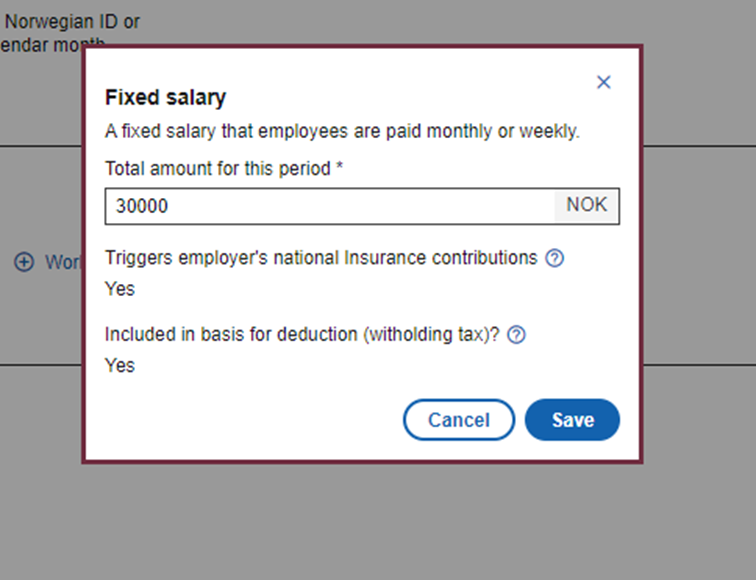
Sum
After selecting income type, a field to register sums will appear.
What to do:
- Fill in the sum/value.
- Fill in additional information where required. Separate fields for this will then appear.
Is the income part of the basis for employer's national insurance contributions or is it subject to withholding tax?
When you select income type, you’ll get information about whether the income is part of the basis for employer's national insurance contributions and/or is subject to withholding tax. For some income types, you can change the pre-filled value.
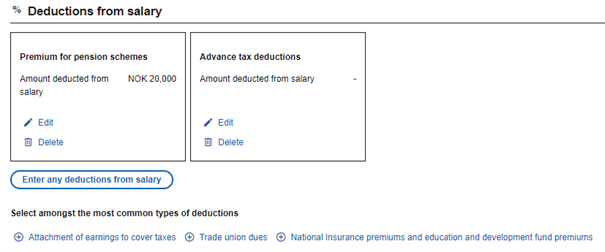
Registering advance tax deductions and any other deductions:
Select "Add deductions from salary", and search for the type of deduction you wish to register.
The most common types of deductions are listed as shortcut options at the bottom of the page. You will be taken straight to the registration of the amount if you click on a shortcut option.
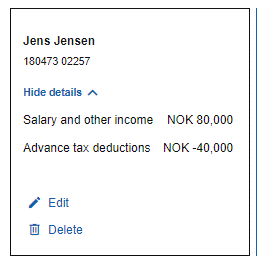
When you have added all the necessary information for the income recipient, you must save.
What to do:
- Click on “Add new income recipient”.
- Register information on the new income recipient.
What to do:
- Find the income recipient you want to edit
- Select the edit-button (pencil icon) to edit the income recipient
- Select the delete-button (bin icon) to delete the income recipient
3 National insurance contributions
Specify the calculation method and the basis for employer’s National Insurance contributions.
Do this to report employer's national insurance contributions:
- Select “+ Add employer’s national insurance contributions”
A window will open where the contribution basis is calculated.
Select the method of calculation for employer's national insurance contributions. You must choose between:
- General trade and industry
- Primary industry (agriculture, fishing, etc.)
- Road freight transport
- Sector-exempt activities (transport and steel sector, etc.)
- Svalbard
- Employees sent from the USA/Canada
- For seafarers aboard Norwegian ships in international service (fixed rate per month per person)
- Special scheme not subject to employer's national insurance contributions, such as the fishing and hunting industries
When you have selected the calculation method, the fields for filling in the zone will become available. Not all calculation methods require that you select a zone.
What to do:
- Select the zone from the drop-down list.
If you’re not sure which zone to report, there’s a guide here: Employer's national insurance contributions - zone subdivision
What to do:
- Fill in the amount to calculate employer's national insurance contributions in the contribution basis field.
- Check the total amount at the top of the page. The total amount is intended to be a guide and is automatically calculated based on a summation of all the income recipients’ taxable incomes.
- Add other taxable income or benefits which have not previously been registered for the income recipient, but which must be included in the basis (for example income below the reporting threshold).
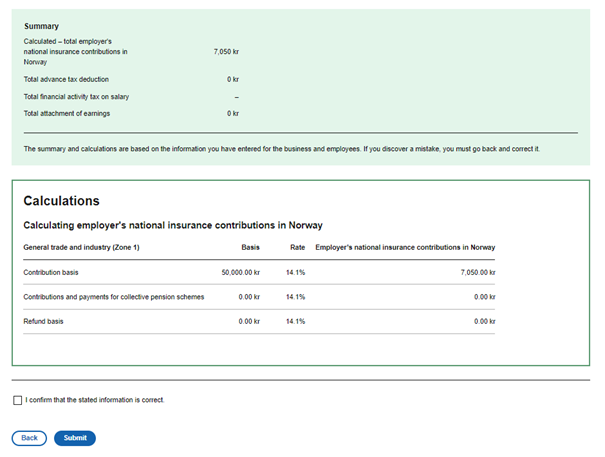
4 Confirm and submit
You’ll see a summary of the information you’ve registered. The calculated employer’s national insurance contributions and advance tax deductions are shown here, as well as any attachment of earnings. You must check the registered information and tick the box to confirm that the information provided is correct.
The summary gives you an overview of:
- The basis for employer's national insurance contributions, based on the amounts filled in in the field “Contribution basis”.
- The amount of employer's national insurance contributions you must pay for this month.
- The amount of total advance tax deduction you must pay for this month.
- The amount of financial activity tax you must pay for this month, if applicable.
- The amount of attachment of earnings you must pay for this month, if applicable.
The information and amounts shown in the overview will depend on the information you have registered previously.
The information shown in the overview will depend on the information you’ve registered previously.
5 Receipt
You’ll get a receipt in your browser when you’ve submitted the a-melding.
A reference number will then be displayed, which is unique to this a-melding. The reference number starts with APR.
In addition to this receipt, you’ll receive feedback (A03 a-melding feedback) in your Altinn inbox.
6 Feedback
You’ll receive feedback each time you submit an a-melding.
This feedback is the result of an automatic check in our systems, that controls the layout of the a-melding. The feedback presents a summary of the information that has been reported and any discrepancies you must correct. It also contains information about paying advance tax deductions, employer's national insurance contributions, financial activity tax and attachment of earnings, including a bank account number and KID number.
If you’ve submitted a-meldings for several businesses under a single legal organisation number, the feedback will contain a summary of all a-meldings for the month.
Have you received feedback without any deviations?
Messages without any deviations mean that the automatic checks in our systems did not find any errors.
Have you received feedback with deviations that need to be checked?
Check the information in the a-melding and correct any errors.
Have you received feedback with deviations that need to be corrected?
Check the information in the a-melding and correct the errors by the ordinary deadline.
How to correct and submit the a-melding:
- Select “Change a-melding”.
- Find the fields you need to correct. Select the Edit button (pencil icon) to make changes.
- Remember to adjust the contribution basis and fill in the amount based on the changes you’ve made.
- Tick the box to confirm that the information provided is correct.
- Submit the corrected a-melding, also known as a replacement a-melding.
When you correct errors, you must ensure that the a-melding you submit is complete. In other words, it must contain all the information that must be reported for the month. Remember that when you report in A10 only the last a-melding to be submitted will apply for the month.
Other tasks
Start with an empty a-melding. You must still go through PARTS 1 to 5 as described here:
- PART 1: Employer
- Register the month for which you’re reporting and the enterprise number.
- PART 2: Income recipient
- Remove income recipients by clicking the dustbin icon.
- PART 3: Employer’s national insurance contributions
- Register information about employer's national insurance contributions.
- PART 4: Summary and conclusion
- Check the information and tick the box entitled “I confirm that the information provided is correct”.
- PART 5: Submit
- Submit the form.
What to do:
- Start with an empty a-melding.
- Fill in the year and month you wish to report for, the enterprise number and any information about pension scheme arrangements
- Delete income recipients by clicking “Delete” (the bin icon), if applicable
- Delete the calculation method for employer's national insurance contributions by clicking “Delete” (the bin icon), if applicable
- Click on “Add financial activity tax on salary” and enter the amount
- Check the information and tick the box “I confirm that the stated information is correct”.
- Submit the a-melding
What to do:
- Start with an empty a-melding.
- Fill in the year and month you wish to report for, the enterprise number and any information about pension scheme arrangements
- Delete income recipients by clicking “Delete” (the bin icon), if applicable
- Delete the calculation method for employer's national insurance contributions by clicking “Delete” (the bin icon), if applicable
- Click on “National insurance premiums and education and development fund premiums” and enter the amount
- Check the information and tick the box “I confirm that the stated information is correct”.
- Submit the a-melding
Submit an empty a-melding for the month. You must still go through PARTS 1 to 5 as described here:
- PART 1: Employer:
- Register month, enterprise number and remove information about pension scheme arrangement.
- PART 2: Income recipient:
- Remove income recipients by clicking the dustbin icon.
- PART 3: Employer's national insurance contributions:
- Remove the calculation method/zone for employer's national insurance contributions by clicking “Edit” and editing the fields.
- PART 4: Summary and conclusion:
- Check the information and tick the box entitled “I confirm that the information provided is correct”.
- PART 5: Submit:
- Submit the blank form.
What to do:
- Select whom you are reporting for
- Select the sub-entity you are reporting for. It is important that it matches the a-melding you want to correct.
- Click “Edit the a-melding” or “Continue with draft” for the period you want to change.
- Make the desired corrections and click “Save ”. The a-melding that is now submitted will replace the previous a-melding for the same period from the same sub-entity. You must therefore ensure that all the information you wish to submit for the period is entered.
- Click “Next” at the bottom of the form.
- Tick the box that you “Confirm that the stated information is correct”
- Click “Submit” at the bottom of the form
- Click “Back to the overview”
- The overview will show the corrected a-melding. After a few seconds, the options “View submitted a-melding” and “View feedback” will appear.
If you report employment in the Assignment and employee register, you can easily import this information into the new solution to avoid having to register it twice.
If this applies to you, a link will pop up on the overview page that will take you to the Assignment and employee register.
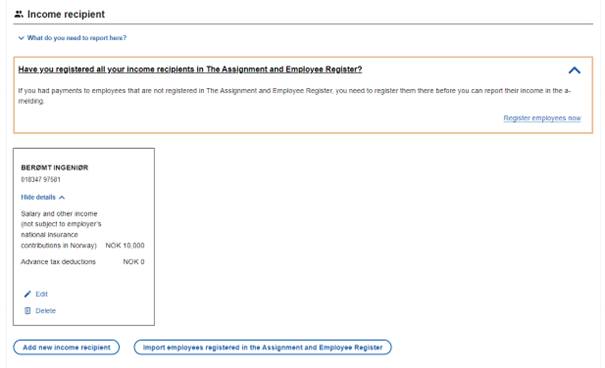
The new solution is integrated with the Assignment and employee register, meaning you only have to report the information once. To register a new employee, click on “Register employees now”.
If you are unsure of how to proceed, you can download the user manual for the Assignment and employee register at the bottom of the page.

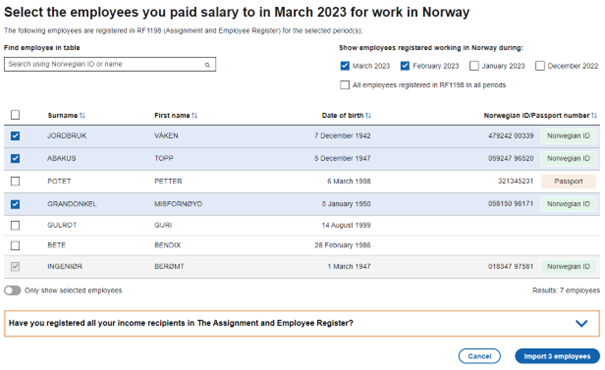
To import employees from the Assignment and employee register into the a-melding, select “Import employees registered in the Assignment and Employee Register”.
A list of all the employees you have registered in the Assignment and employee register will then pop up. Here you can choose which employees you wish to import into the a-melding for the relevant month.
Finally, select “Import employees”.
Do you need help?
Details of who to contact if you have any questions concerning the a-ordning scheme are given on this page: contact the a-ordning scheme